Unlock Your Raspberry Pi's Full Potential: A Comprehensive Guide To Remote Access
Introduction: The Power of a Hidden Pi
The Raspberry Pi has revolutionized the world of computing, offering a compact, affordable, and incredibly versatile platform for hobbyists, educators, and even businesses. From simple coding projects to complex automation systems, its capabilities seem limitless. However, many Raspberry Pi enthusiasts find themselves in a common predicament: "Are you confused about how to set up a Raspberry Pi remotely without a monitor or keyboard?" You might have started with a screen and peripherals, but as your projects evolve, the idea of having a dedicated monitor and keyboard for each Pi becomes impractical. In fact, "many Raspberry Pi enthusiasts find their beloved mini-computer hidden away in a drawer, never to see the light of day again." This is precisely where the concept of "Remote It Raspberry Pi" comes into play – transforming your Pi into a powerful, standalone device that you can control from anywhere, anytime. This article will guide you through the essential methods and exciting possibilities of remotely accessing your Raspberry Pi. We'll explore why going headless is a game-changer, what you need to get started, and the various ways you can interact with your Pi without ever needing to plug in a physical display or keyboard.Why Go Headless? The Benefits of Remote Access
The term "headless" simply means operating your Raspberry Pi without a monitor, keyboard, or mouse connected directly to it. This approach offers a multitude of benefits that maximize the Pi's inherent strengths:- Ultimate Convenience: Imagine your Raspberry Pi tucked away in a corner, silently performing its duties. When you need to make a change or check its status, you don't have to physically retrieve it or plug in peripherals. "When running projects on a headless Raspberry Pi, it may not always be convenient to plug it into a monitor when you want to change something." Remote access eliminates this hassle entirely.
- Space Efficiency: The Raspberry Pi is renowned for its small footprint. By going headless, you can "maximize its small footprint by turning it into a maximum standalone box – no monitor, keyboard, or other" bulky accessories. This makes it ideal for embedding into projects, placing in discreet locations, or simply decluttering your workspace.
- Deployment Flexibility: Whether it's a home automation server in your closet, a media center behind your TV, or a sensor hub in your garden shed, a headless Pi can be deployed almost anywhere with network access.
- Resource Optimization: Without the overhead of running a graphical desktop environment on the Pi itself, more system resources (CPU, RAM) are available for your actual applications and projects.
Getting Started: What You'll Need
Before you dive into the world of remote access, ensure you have the right hardware and software:- Compatible Raspberry Pi: "This is compatible with Raspberry Pi 4, 5, and 400." These models offer the necessary processing power and connectivity for a smooth remote experience.
- Operating System: "It requires 64-bit Raspberry Pi OS Bookworm." Ensure your Pi is running the latest recommended operating system for optimal performance and compatibility with remote access tools.
- Power Supply: A reliable power supply is crucial for stable operation.
- MicroSD Card: A high-quality microSD card (at least 16GB, preferably 32GB or more) flashed with Raspberry Pi OS Bookworm.
- Network Connection: Your Pi will need to be connected to your local network, either via Ethernet or Wi-Fi, for remote access to work. For initial setup, you might briefly need a monitor/keyboard to enable SSH or configure Wi-Fi if you haven't done so via the headless setup process.
- Client Device: A computer (Windows, Linux, or macOS) or even a smartphone from which you will access your Raspberry Pi remotely.
Methods for Remotely Accessing Your Raspberry Pi
There are several robust methods to access your Raspberry Pi remotely, each suited for different tasks:SSH: The Command Line Powerhouse
SSH, or Secure Shell, is the most fundamental and widely used method for remotely accessing a Linux-based system like the Raspberry Pi. It provides a secure, encrypted connection over which you can execute commands, manage files, and configure your Pi directly from your client machine's terminal. "How to SSH into Raspberry Pi for Remote Access was published on August 01, 2022 at 14:59." This method is perfect for:- Running scripts and programs.
- Installing software packages.
- Managing system services.
- Transferring files securely.
- Troubleshooting and debugging.
RDP: Your Desktop, Anywhere
While SSH is excellent for command-line tasks, sometimes you need a full graphical desktop experience. This is where Remote Desktop Protocol (RDP) comes in. "With RDP, you can log in to a Raspberry Pi box from any other computer running Windows, Linux, or macOS, and create a real desktop session." This means you'll see the familiar Raspberry Pi OS desktop environment on your client machine, allowing you to use graphical applications, browse the web, or perform visual development tasks as if you were sitting right in front of your Pi. "You will know: What are remote desktops (remote desktops)." RDP is particularly useful for:- Developing with IDEs that have graphical interfaces.
- Using desktop applications like LibreOffice or web browsers.
- Visualizing data or monitoring system performance with GUI tools.
- Providing remote support or demonstrations.
Unleashing Projects: What You Can Do Remotely
Once you've mastered remote access, the possibilities for your Raspberry Pi projects explode. The ability to control and interact with your Pi from afar opens up a world of innovative applications. "Whatever your application and whatever your scale, Raspberry Pi offers cost-effective, high-performance computing for businesses and the home." Truly, "there’s a computer for that." Here are just a few examples of projects you can power with a remotely accessible Raspberry Pi, drawing directly from the provided data:- Media Streaming Hub: "If you want to power your media streaming game, installing Plex on Raspberry Pi is definitely the way to go. Plex is a Kodi-like media" server that allows you to stream your entire media library to any device in your home or even remotely.
- Wireless Device Control: "In this session, we are going to develop an RF remote control using Raspberry Pi, which can be used to control devices wirelessly." Imagine controlling lights, fans, or even garage doors from your phone or another computer.
- Large-Scale Art Installations: "Remote Big LED Matrix ArtNet Raspberry Pi: We want to create a large WiFi LED matrix. This project involves 200..." remotely controlling hundreds of LEDs for dynamic visual displays.
- Smart Displays and Clocks: "Displaying time on a 4-digit 7-segment display using Raspberry Pi" can be managed and updated remotely, making it perfect for smart home dashboards or custom clocks.
- Unique Gadgets and Automation: "Harry Potter IR Remote with Raspberry Pi: This instructable outlines how to create a simple Python script that makes a Harry Potter universal remote." You can create and deploy custom remote controls or automation scripts without ever touching the Pi itself.
- Whole-Home Audio Systems: "Raspberry Pi Whole Home Synchronous Audio with Phone App Remote: 10 steps (with pictures)" allows you to stream synchronized audio across multiple rooms, all managed from your smartphone.
Tips for a Smooth Remote Experience
To ensure your remote access is as seamless as possible, consider these tips:- Static IP Address: Assigning a static IP address to your Raspberry Pi on your local network prevents its IP from changing, which can be frustrating when trying to connect.
- SSH Keys for Security: Instead of passwords, use SSH keys for a more secure and convenient way to log in via SSH.
- Network Stability: A stable and fast network connection (both for your Pi and your client device) is crucial for a responsive remote experience, especially with RDP.
- Firewall Configuration: Ensure your network firewall allows the necessary ports (e.g., port 22 for SSH, port 3389 for RDP) for remote access.
Conclusion
The ability to "Remote It Raspberry Pi" is more than just a convenience; it's a fundamental aspect of unlocking the full potential of this incredible mini-computer. By embracing headless operation and utilizing powerful tools like SSH and RDP, you transform your Raspberry Pi from a desktop curiosity into a versatile, embedded computing powerhouse. No longer will your beloved Pi be relegated to a drawer; instead, it can be deployed anywhere, performing complex tasks silently and efficiently, all while remaining fully accessible and controllable from your fingertips. Dive in, experiment with remote access, and discover the endless possibilities that await your Raspberry Pi projects.Summary
This article explored the concept of "Remote It Raspberry Pi," detailing how to access and control your Raspberry Pi remotely without a monitor or keyboard. It highlighted the benefits of a headless setup, including convenience, space efficiency, and deployment flexibility, especially for Raspberry Pi 4, 5, and 400 running 64-bit Raspberry Pi OS Bookworm. Key remote access methods like SSH for command-line control and RDP for a full graphical desktop experience were explained. The article also showcased various projects that benefit from remote access, such as media streaming with Plex, wireless device control, large LED matrices, smart displays, and whole-home audio systems, emphasizing the Raspberry Pi's cost-effective and high-performance computing capabilities for diverse applications.- Sports And Learning
- Pokemon Crystal Legacy Rom
- Bubblehouse Tea
- Plus Size Stripper Bars
- South County Middle School
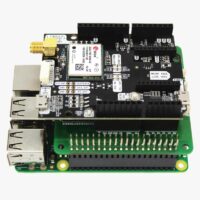
simpleRTK के लिए रास्पबेरी पाई अडैप्टर - ArduSimple

अपने SimpleRTK2B को रास्पबेरी पाई से कैसे कनेक्ट करें - ArduSimple
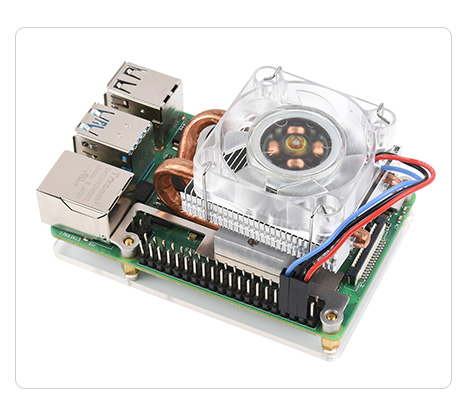
Low-Profile ICE Tower Cooling Fan for Raspberry Pi at ₹ 1899.99
