Securely Connect Remote IoT: Raspberry Pi, VPC, And Windows – Your Ultimate Guide
In today's digital age, the concept of securely connecting remote IoT devices has become increasingly important. More businesses and individuals rely on connected devices for various purposes, from smart homes to industrial automation. If you're diving headfirst into the world of IoT (Internet of Things) and cloud networking, chances are you've been thinking about how to ensure your gadgets talk to each other safely and efficiently. Let's talk about something that’s been on everyone’s mind lately: securely connecting remote IoT devices through a Virtual Private Cloud (VPC) using a Raspberry Pi.
If you're looking to securely connect your Raspberry Pi to a VPC and manage IoT devices remotely, this guide will walk you through the process step by step. You might be thinking, "Is this even possible?" Absolutely! This article delves into the practical steps and best practices to establish a secure connection between your Raspberry Pi and a remote VPC, ensuring your IoT ecosystem remains protected. By the end of this guide, you'll understand how to configure SSH, connect to a virtual private cloud (VPC), and even learn about downloading Windows 10 files effortlessly for your management setup.
We will explore everything you need to know about setting up a remote IoT environment, including downloading free Windows software (legally, of course), configuring SSH, and optimizing your VPC for seamless communication. This article provides a detailed exploration of securely connecting remote IoT devices to a VPC using a Raspberry Pi, specifically focusing on how a Windows environment can play a crucial role in managing this setup. We will delve into the necessary steps, software, and best practices to ensure a secure and efficient setup. By following the outlined procedures, you can safeguard sensitive data and maintain operational integrity.
Why Secure IoT Connections Matter and the Tools You'll Need
The proliferation of IoT devices brings incredible convenience and efficiency, but it also introduces significant security risks if not handled properly. An insecure connection can expose sensitive data, allow unauthorized access to your network, or even compromise the integrity of your entire IoT ecosystem. That's why securing your remote IoT connection is paramount.
For this guide, we'll be leveraging three key components:
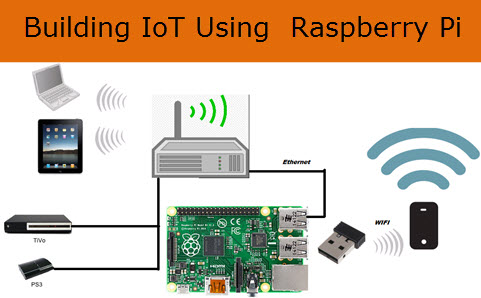
- Raspberry Pi: A versatile, low-cost single-board computer perfect for IoT projects due to its small form factor, low power consumption, and GPIO pins for hardware interaction.
- Virtual Private Cloud (VPC): A logically isolated section of a public cloud (like AWS, Azure, or Google Cloud) where you can launch resources in a virtual network that you define. It provides a secure and private network environment for your IoT devices to communicate with your cloud services.
- Windows: While the Raspberry Pi runs a Linux-based OS, a Windows machine can serve as your primary workstation for managing the Pi, configuring your VPC, and utilizing various development tools.
If you're looking to securely connect your remote IoT devices using Raspberry Pi, AWS VPC, and Windows, you've landed in the right place.
Getting Started: Setting Up Your Raspberry Pi and VPC
Alright, let’s get our hands dirty. Here’s how you can securely connect your remote IoT VPC using Raspberry Pi and Windows.
1. Downloading and Preparing Raspberry Pi OS
First things first, you’ll need to download Raspberry Pi OS. Head over to the official Raspberry Pi website and grab the latest version. This is the operating system that will run on your Raspberry Pi. You'll typically download an image file that you then flash onto a microSD card using a tool like Raspberry Pi Imager. Make sure you have a good quality microSD card (16GB or more is recommended) and a power supply for your Pi.
2. Setting Up Your Virtual Private Cloud (VPC)
Creating a VPC is the cornerstone of your secure remote IoT environment. The exact steps will vary depending on your chosen cloud provider (e.g., AWS, Azure, Google Cloud). However, the general idea is to:
- Define your VPC: Specify an IP address range (CIDR block) for your VPC.
- Create subnets: Divide your VPC into smaller subnets (e.g., public and private subnets).
- Configure internet gateway/NAT gateway: Allow resources in your VPC to communicate with the internet (if needed).
- Set up route tables: Control network traffic flow within your VPC and to the internet.
- Create security groups and network ACLs: These act as virtual firewalls, controlling inbound and outbound traffic to your instances and subnets. This is crucial for security.
Once created, you'll attach your Raspberry Pi to the VPC for a secure connection. This usually involves configuring your Pi to connect to a VPN server running within your VPC or setting up direct peering/tunneling, ensuring that all communication between your Pi and your cloud services happens within this isolated network.
Securing Your Remote IoT Connection with SSH
With your Raspberry Pi and VPC in place, it’s time to focus on securing your remote IoT connection. The primary tool for this is SSH.
Understanding and Configuring SSH
SSH, or Secure Shell, is a cryptographic network protocol for operating network services securely over an unsecured network. It's the go-to method for securely connecting to your Raspberry Pi remotely. Using SSH for secure communication encrypts all data exchanged between your management machine (your Windows PC) and your Raspberry Pi, preventing eavesdropping and tampering.
To configure SSH on your Raspberry Pi:
- Enable SSH: When setting up Raspberry Pi OS with the Imager, you can usually enable SSH directly. Alternatively, after the first boot, you can enable it via the `raspi-config` tool (`sudo raspi-config`) or by creating an empty file named `ssh` in the boot partition of your SD card.
- Change default password: Immediately change the default 'pi' user password to a strong, unique one. Even better, disable password authentication and use SSH key pairs for superior security.
- Generate SSH keys: On your Windows management PC, use a tool like PuTTYgen (if you're using PuTTY) or the built-in `ssh-keygen` command in PowerShell/WSL to generate a public/private key pair.
- Copy public key to Raspberry Pi: Use `ssh-copy-id` (if available via WSL/Git Bash) or manually copy your public key to the `~/.ssh/authorized_keys` file on your Raspberry Pi.
- Disable password authentication: Edit the `sshd_config` file (`sudo nano /etc/ssh/sshd_config`) on your Raspberry Pi to set `PasswordAuthentication no`.
- Restart SSH service: Apply changes by restarting the SSH service (`sudo systemctl restart ssh`).
Now, you can connect to your Raspberry Pi from your Windows machine using an SSH client (like PuTTY or Windows Terminal with OpenSSH) using your private key, ensuring a highly secure connection.
Integrating Windows into Your IoT VPC Environment
This article specifically focuses on a Windows environment because it's a common platform for many users. Whether you're downloading the necessary software or configuring settings on Windows, we’ve got you covered.
The Role of Windows in This Setup
Your Windows PC acts as the central management hub. From here, you will:
- Run the Raspberry Pi Imager to prepare your SD card.
- Use SSH clients (PuTTY, Windows Terminal) to connect to your Raspberry Pi.
- Access your cloud provider's console (via a web browser) to configure your VPC.
- Install and run various development tools, IDEs (like VS Code), and IoT platforms that might have Windows-specific clients or SDKs.
- Potentially download and manage Windows 10 files, such as official ISOs for setting up other development machines or virtual environments, as part of your broader tech ecosystem.
Legally Downloading Windows for Free (for your Management PC)
The phrase "downloading Windows for free (legally, of course)" refers to obtaining the official Windows installation media. Microsoft provides free downloads of Windows 10 and Windows 11 ISO files directly from their website. These ISOs allow you to install the operating system on a compatible PC. While the *download* is free, activating the full operating system typically requires a valid license key. For our purposes, this means you can easily acquire the necessary files to set up or troubleshoot your Windows management workstation without any legal concerns.
Best Practices for a Secure and Efficient IoT Setup
To ensure your IoT ecosystem remains protected and operates seamlessly, consider these best practices:
- Regular Updates: Keep your Raspberry Pi OS, all installed software, and your Windows management PC updated. Software updates often include crucial security patches.
- Strong Passwords and SSH Keys: Always use strong, unique passwords for any accounts, and prioritize SSH key-based authentication over password authentication for remote access to your Raspberry Pi.
- Least Privilege Principle: Grant only the necessary permissions to users and services. If an IoT device or service only needs to read data, don't give it write access.
- Firewall Rules: Configure strict firewall rules on your Raspberry Pi and within your VPC security groups. Only open ports that are absolutely essential for communication.
- Network Segmentation: Utilize VPC subnets to segment your network. For example, keep your IoT devices in a private subnet, and only allow necessary communication to public services or management interfaces.
- Monitoring and Logging: Implement monitoring and logging solutions to track activity within your VPC and on your Raspberry Pi. This helps detect unusual behavior and potential security breaches early.
- Data Encryption: Encrypt sensitive data both in transit (using SSH, TLS/SSL) and at rest (if storing data on the Pi or cloud storage).
Conclusion
Connecting remote IoT devices securely has become increasingly important, and with a Raspberry Pi, a well-configured VPC, and a Windows management environment, you have a powerful and secure setup at your fingertips. We've explored everything you need to know about setting up a remote IoT environment, including preparing your Raspberry Pi, configuring your VPC, and leveraging SSH for secure communication. We also clarified how a Windows PC fits into this ecosystem, including the legal aspects of downloading Windows 10 files for your management needs.
By following the outlined procedures, you can safeguard sensitive data and maintain operational integrity, ensuring your IoT devices communicate securely and efficiently. This guide has provided a detailed exploration of securely connecting remote IoT devices to a VPC using a Raspberry Pi, specifically focusing on how a Windows environment can be used effectively for management. By the end of this guide, you should feel confident in your ability to configure SSH, connect to a virtual private cloud (VPC), and manage your remote IoT setup with ease and security.

How To Securely and Directly Connect Raspberry Pi with RemoteIoT P2P

Securely Connect Remote IoT P2P SSH Raspberry Pi Free Server
Building The (Internet of Things) IOT Using Raspberry Pi
