Mastering Remote IoT: Your Comprehensive Raspberry Pi Remote IoT Tutorial
What is Raspberry Pi Remote IoT and Why Should You Care?
Before we dive into the nitty-gritty, let's clarify what we're talking about. What is Raspberry Pi Remote IoT and why should you care? The Raspberry Pi has revolutionized the world of DIY electronics and programming. It is a microcomputer with a micro price, but don’t be fooled by its size; it packs a powerful punch! This credit-card-sized computer is capable of doing almost anything a desktop PC can, but with significantly lower power consumption and a much smaller footprint. Its versatility has made it a favorite among hobbyists, educators, and even professionals for a wide array of projects, from media centers to home automation systems. Remote IoT, on the other hand, refers to the ability to control, monitor, and interact with physical devices over the internet, regardless of your physical location. Imagine turning off your lights from your phone while you're at work, or receiving alerts from a sensor in your backyard while you're on vacation. This is the essence of remote IoT. When you combine the power and flexibility of the Raspberry Pi with remote IoT capabilities, you unlock an incredible potential for innovation. Raspberry Pi works seamlessly with a variety of sensors, cameras, and other IoT devices, making it easy to integrate into existing systems or build entirely new ones from scratch. This combination is your pathway to mastering the art of crafting intelligent IoT systems. In this article, we'll explore everything you need to know about using Raspberry Pi for remote IoT projects, covering everything from setting up your Raspberry Pi to integrating it with remote IoT platforms.Key Components for Your Raspberry Pi Remote IoT Journey
To successfully complete a Raspberry Pi Remote IoT tutorial, you'll need a few essential components. Don't worry, these are generally affordable and widely available. * **Raspberry Pi Board:** Start with a Raspberry Pi board, preferably a recent model like the Raspberry Pi 4, which offers better performance and more features. While older models can work, the Pi 4's increased processing power and RAM will provide a smoother experience, especially for more complex IoT projects. * **Power Supply:** A compatible USB-C power supply (for Pi 4) or Micro USB power supply (for older models) is crucial to power your Raspberry Pi reliably. * **MicroSD Card:** A high-quality MicroSD card (at least 16GB, preferably 32GB or more) is needed to install the operating system. * **Monitor, Keyboard, and Mouse (for initial setup):** While you can set up your Raspberry Pi headless (without a monitor), for beginners, having these peripherals for the initial setup can make the process much smoother. * **Ethernet Cable or Wi-Fi Dongle:** To connect your Raspberry Pi to your local network and the internet. Most recent Raspberry Pi models have built-in Wi-Fi. * **Internet Connection:** Essential for downloading software and accessing remote IoT platforms. With these components in hand, you're ready to embark on your remote IoT adventure!Setting Up Your Raspberry Pi for Remote IoT
Setting up remote IoT for remote access to your Raspberry Pi is a straightforward process. Below, we'll guide you through each step in detail, ensuring you can successfully get your system up and running.Step 1: Initial Raspberry Pi Setup
First, you'll need to get your Raspberry Pi up and running with an operating system. The most common choice is Raspberry Pi OS (formerly Raspbian). 1. **Download Raspberry Pi Imager:** Go to the official Raspberry Pi website and download the Raspberry Pi Imager software for your computer. 2. **Flash Raspberry Pi OS:** Insert your MicroSD card into your computer. Open Raspberry Pi Imager, choose "Raspberry Pi OS (64-bit)" or "Raspberry Pi OS (32-bit)" under the operating system options, select your MicroSD card, and click "Write." This will install the operating system onto your card. 3. **Boot Your Raspberry Pi:** Once the flashing is complete, insert the MicroSD card into your Raspberry Pi, connect your monitor, keyboard, and mouse, and then plug in the power supply. Your Raspberry Pi should boot up. 4. **Initial Configuration:** Follow the on-screen prompts to set up your locale, password, and connect to your Wi-Fi network. Ensure your Raspberry Pi is connected to the internet.Step 2: Installing the Remote IoT Service
This is where the magic of remote IoT begins. To enable remote access, you'll need to install the specific remote IoT service on your Raspberry Pi. 1. **Open the Terminal or SSH:** Open the terminal of your Raspberry Pi directly, or if you prefer a headless setup, access your Raspberry Pi with SSH on the local network. To do this, you'll need your Raspberry Pi's IP address (you can find it using `hostname -I` in the Pi's terminal or by checking your router's connected devices list). Then, from another computer, use `ssh pi@your_pi_ip_address` (default username is `pi`). 2. **Install the Remote IoT Service:** Once you're in the terminal, you'll execute the commands provided by your chosen remote IoT platform to install their service. This usually involves a simple `curl` command followed by `bash` or a `wget` command to download an installation script. Follow the specific instructions provided by your remote IoT service provider carefully. This process typically involves downloading a small agent that runs in the background, securely connecting your Raspberry Pi to the remote IoT platform's servers.Step 3: Accessing the Remote IoT Dashboard
With the service installed on your Raspberry Pi, the next step is to interact with it from your web browser. 1. **Open the Remote IoT Portal:** Now, open the remoteiot portal in your browser. This will be a specific URL provided by your remote IoT service. 2. **Login to the Dashboard:** Log in to the dashboard using the account credentials you created with the remote IoT service. 3. **Verify Connection:** You should now see your Raspberry Pi in the list of account devices. This confirms that your Raspberry Pi has successfully connected to the remote IoT platform and is ready for remote management. If you don't see it immediately, give it a few moments and refresh the page, or check the service status on your Raspberry Pi.Exploring the World of Remote IoT with Raspberry Pi
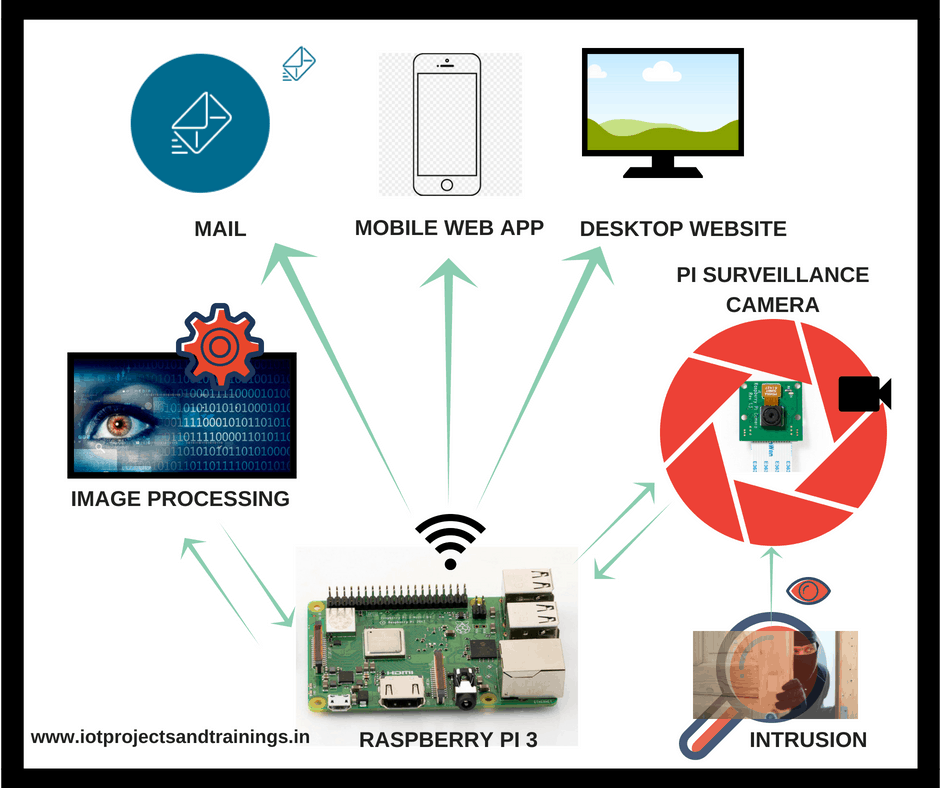
Once your Raspberry Pi is connected and visible in the remote IoT dashboard, the possibilities are endless. You can now start integrating various sensors, cameras, and other IoT devices. The remote IoT platform will allow you to read data from these sensors, send commands to actuators, and even stream video from cameras, all from anywhere with an internet connection. The Raspberry Pi community is massive and incredibly supportive, providing tons of resources and tutorials to help you get started with specific projects. Whether you want to build a smart home system, a weather station, a security camera, or something entirely unique, you'll find ample guidance and inspiration. This Raspberry Pi Remote IoT tutorial is a comprehensive guide, designed to navigate you through the intricacies of establishing and managing remote access to your Raspberry Pi devices. It truly is your pathway to mastering the art of crafting intelligent IoT systems.Conclusion
By the end of this Raspberry Pi Remote IoT tutorial, you'll have a solid understanding of how to set up your own IoT network, turning your Raspberry Pi into a powerful hub for remote control and monitoring. We've covered what Raspberry Pi Remote IoT is, why it's a game-changer, the essential components you'll need, and a detailed step-by-step guide to get your system online. The process of setting up remote IoT for remote access to your Raspberry Pi is a straightforward process, and with the guidance provided, you're well on your way to becoming an IoT master. So, grab your Raspberry Pi, follow the steps outlined in this tutorial, and start exploring the world of remote IoT. The power to create intelligent, interactive realities is now literally at your fingertips. And don’t forget to share your experiences in the comments below—we’d love to hear how it goes!
How to Get Started With IoT Using Raspberry Pi and PuTTY: Part 1
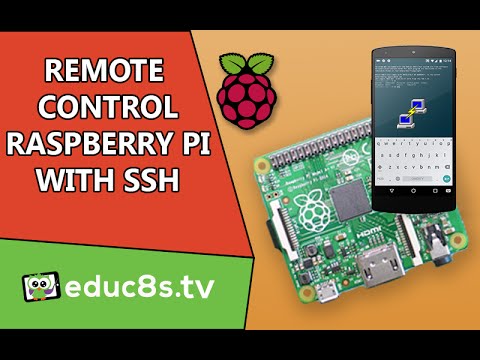
Raspberry Pi tutorial: Use SSH to in order to remote control your
Iot Projects And Tutorials Using Arduino Raspberry Pi - vrogue.co
